

New cycling shoes? What landmarks should you use to set up your cleats?
A new pair of cycling shoes can be exciting and daunting all at the same time. It’s always exciting to try our new technologies with the latest footwear. New shoe day can also feel scary when its time to place cleats. Especially if you love the cleat position on your old set up.
Today we will outline a quick and easy method for transferring your beloved cleat position over to your new shoes. Instead of simply eyeballing cleat placement or referencing the markings or tread on your shoes, we recommend referencing anatomical landmarks as they will stay the same from shoe to shoe.
First things first, an anatomy review. The main landmarks we need to identify are the first metatarsal head and the fifth metatarsal head. The first metatarsal head is the largest joint at the big toe and the fifth metatarsal head is the largest at the little toe. This joint joins the phalange to the metatarsal bone itself. These landmarks are classic bike fit landmarks and will help us triangulate the position of the cleat vs the foot itself. We will do a separate post to discuss the details of why we might place a cleat in a specific position and how that relates to the landmarks above.


You will want to feel for these prominent joints at the big and small toe with your shoes off to become familiar with the mid point of these areas. Then we will place your old shoes on to feel for the joint through the shoe and mark with tape. To be a bit more precise I will then draw a line over the center of each joint.
This shoe has the cleat set more towards the fifth met vs the first met.
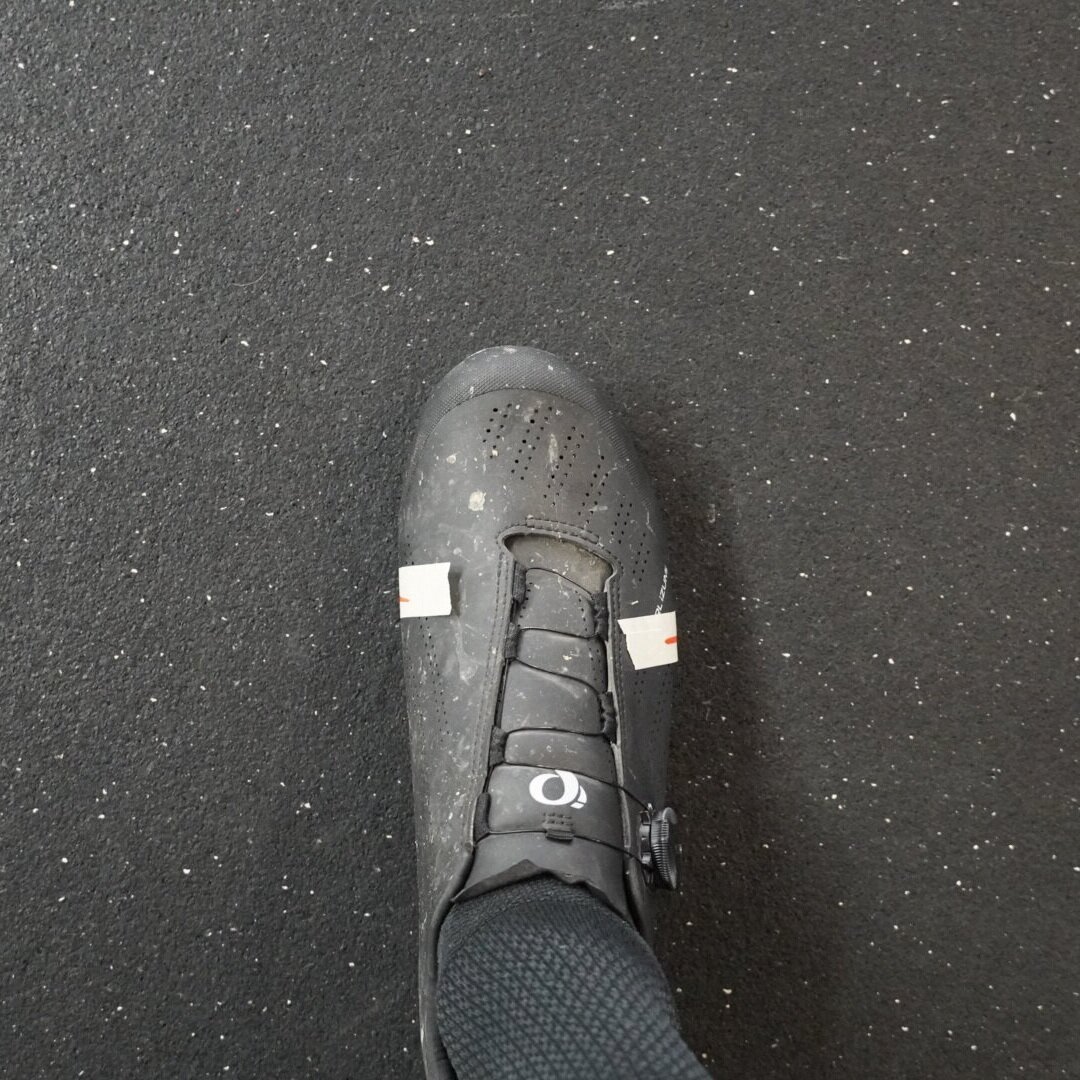
It’s relatively easy to find the first and fifth met through your shoes. Once you find the joint, mark with tape for reference.

I like to draw a vertical line throughout the most prominent area of the joint and continue under the shoe for reference.

Vertical line drawn through the first met head.

This cleat is clearly more aft, or towards the fifth met head.

I also like to visualize how far the cleat is placed medially or laterally. Due to different cleat pocket placements show to shoe this visual estimate may not always be accurate but it is a good starting point. I will also draw a line throughout the center of the shoe to reference where on the cleat body that center line is. This helps me compare the medial to lateral placement of my cleat on the new shoe.
The next part is actually quite easy, placing the cleats on your new shoes and lining up the cleat vs the landmarks. I simply feel for these same joints while wearing my new shoes, place tape, and mark them, in the same way, I did on the old shoes. I then add a cleat to the new shoe and use a photo or the old setup as a guide. For folks that may have pain problems from cleat issues, I would actually use calipers to measure the exact distance from these lines to be certain we get the cleat where it needs to be. In these instances, I would also verify medial and lateral position while they are on the bike.
If you just got some new cycling shoes, give this quick method a try if you want to recreate your old setup. If you have questions about any of the details in our method, please let us know, We would be happy to help you get your shoes set for spring training rides.